
First Look – Polar Pals Creative Cuts
September 12, 2014
Good morning everyone! Mama Elephant will be releasing 2 standalone creative cuts as well as 4 coordinating creative cuts for some of the older sets this month. Today, I will be giving you a first look at the coordinating creative cuts for Polar Pals. All the dies used here will be released on September 15.
Lately, I’ve been addicted to partial die-cutting and today’s project is no exception 🙂 I have a partial die-cutting video that will come up later during the month, but in the mean time, I have some step by step photos so that you too, could perfect this useful technique!
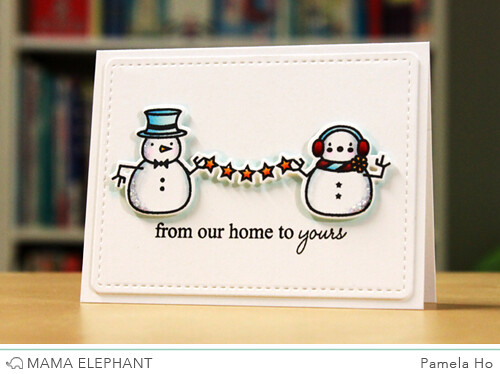
I first stamped the two snowmen holding onto a garland of stars. And here begins the die-cutting magic.
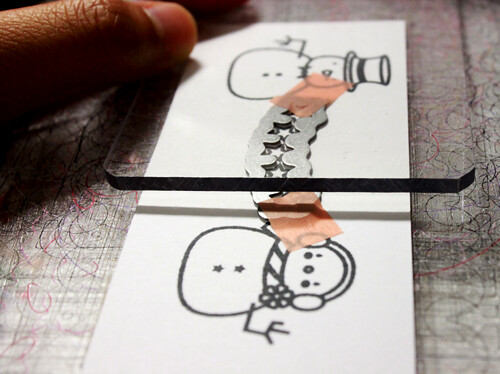
Step 1: Secure the middle die with some washi tape. Position the top cutting plate so that it covers most of the left side of the die. Position the bottom cutting plate so that it is under most of the right side of the die. Roll it across the machine.
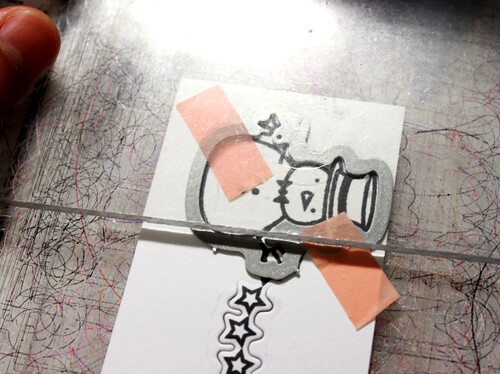
Step #2: Secure the first snowman die. Position the top cutting plate so that it does not cover where the hand meets the stars. Roll it across the machine.
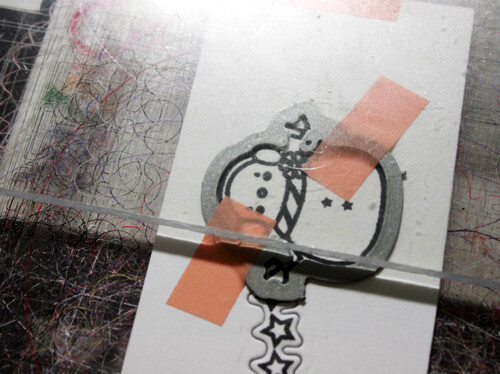
Step #3: Secure the second snowman die. Position the top cutting plate so that it does not cover where the hand meets the stars. Roll it across the machine.
Step #4: This is what you are left with after all the cutting. Using a craft knife, carefully cut apart any places that are still connected (ie: the section where the stars meets the hand)

Step #5: Colour!

I adhered die-cut using some foam tape onto a piece of cardstock that was cut using a die from Peek a Frames that will also be released on September 15. I stamped a sentiment from Polar Pals underneath snowmen and mounted it onto my card base.
Thank you for stopping by!


September 12, 2014 at 6:11 am
Omigoodness, what a great technique! Thanks for the tutorial 🙂 Super cute card! 🙂
Lauren
September 12, 2014 at 8:32 am
So cute!
September 12, 2014 at 5:08 pm
Very, very cute!!! How did you color the shadow behind your image. When I try that, it never looks right.
September 14, 2014 at 5:46 am
Now that is genius.
October 5, 2014 at 6:29 am
Great technique! Adorable card!